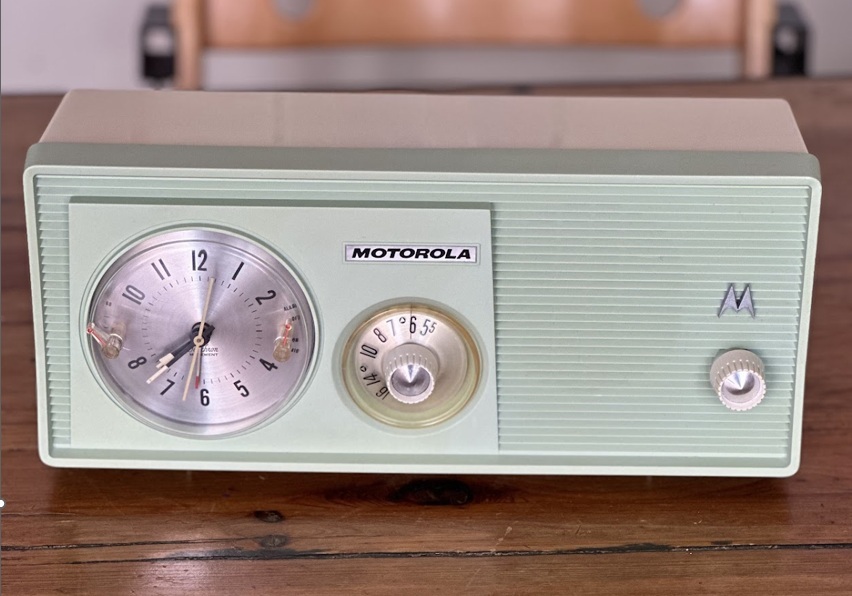
(Photo of the finished project)
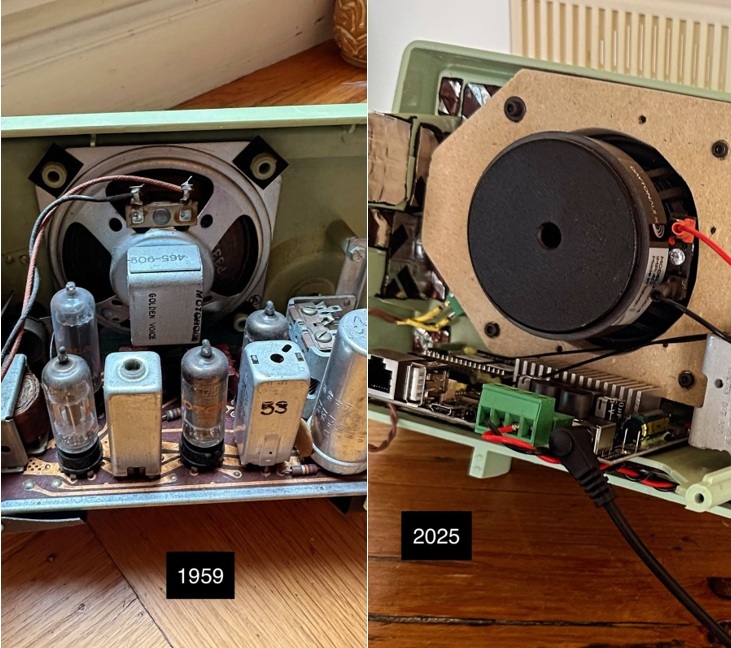
I had this idea of taking good looking old classic radios and rebuilding them with modern components. Seems a lot cooler than a commercial Bluetooth shelf speaker, if you ask me. So I bought a 1959 Motorola 5C14GW because I loved the mid-century look. I actually bought two and picked up a few other stereos that were older, but the Motorola ended up being the one I liked most. Maybe they will be future projects. The plan was to keep the exterior looks, the Telechron clock movement, replace the radio guts, and make it safe and serviceable. I started by tossing the old tube circuitry and speaker. Sacrilegious! To some, I am sure. But this was a common mass-produced radio and I felt fine about it. The tube chassis, the old mains harness, and the line caps all came out so I had a clean start.
For a speaker, I used a Dayton RS100-4 full-range driver. It was a beefy little upgrade compared to the original. I cut a ½″ MDF baffle for it to add dampening and bracing that didn’t exist in the original radio. I put brass inserts in the baffle and original case so it's easy to remove if needed.

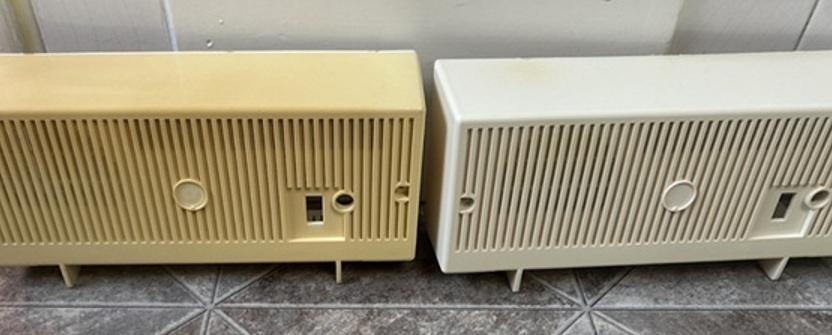
I spent a lot of time restoring the cabinet. To remove all the plastic yellowing, I learned to retrobright—which is really just hydrogen peroxide plus sunlight. It is a pretty cool technique common for collectors of old Nintendo's, sneakers, and such to restore their original colors. You can see below a case I retrobrighted (Right) next to one that still has 75 years of UV yellowing (Left).
I then sanded everything down through progressive grits, rubbed in Novus liquids, and sprayed with a UV protector to keep it looking nice and not yellowing again. I had stripped all the decals and so reapplied them. I also put new chrome paint on a few bits.
Inside the cabinet, I used butyl on the inner walls for mass damping and added some acoustic foam to tame reflections, staying clear of the vents and the driver’s back wave. The stereo now weighs about twice what it did originally.
For electronics, I mounted an Arylic Up2Stream Amp. The Wi-Fi and Bluetooth antennas were placed away from the speaker magnet and the AC run.
For controls, I installed an audio-taper volume pot behind the original knob and hid a momentary switch that connects to the Arylic’s front-button pads, so it powers on and cycles inputs like a push-button without changing the look.
Next I tackled the clock. I wanted to preserve this. The challenge is the clock needs AC and the sound electronics need DC. The simplest solution was to run two separate power sources. One cord is a 19 V laptop brick that feeds an Arylic. The other is an IEC C8 inlet that powers only the Telechron clock at 120 V AC. I added fuses for safety on the AC. Keeping AC for the clock and DC for the amp on different cords made noise control and troubleshooting straightforward.

With everything back together, it sounds lively and good for a small single speaker. And of course, a world apart from the original. I haven’t done any DSP yet, but will when I get around to it. The plan is to measure in place and then use ACPWorkbench to add a few parametric filters.
Where it stands now: the cabinet looks fresh without losing its character and it sounds pretty darn good for a little old radio.
I am not sure how much time I put into this—perhaps 20 or 30 hours? More than half of that time was researching various things like what would fit where, how to make a push button out of the old volume knob, the process of restoring plastic, or how that Telechron clock even works. ChatGPT turned out to be extremely helpful in answering a lot of these questions.
Main Parts
Other Parts and Supplies
- ½″ MDF baffle with ~35mm rear clearance
- Brass threaded inserts and machine screws for baffle mounting to cabinet
- 19 V DC laptop power brick (for the Arylic)
- Two-prong mains cord with snap-in C8 AC inlet (for the clock)
- Inline cartridge fuse holders, 5×20 mm, mains-rated w/ fast-acting ceramic fuses
- Push-switch volume potentiometer (used as a push button, volume controlled remotely)
- Butyl sheet for cabinet panels
- Acoustic foam lining, ¼″
- Speaker wires
- Heat-shrink tubing and cable ties
- 3M VHB tape (to mount the Arylic)
- Salon Care 40 cream developer (for retrobrighting)
- Progressive wet-sand papers
- Novus #2 and Novus #1 plastic polishes
- UV-resistant clear coat (Krylon UV-Resistant Clear Matte)
- Liquid chrome marker for touch-ups
- E6000 Quick Hold to reattach decals